Do you know what dreams are made of? Go on and tell me all about it then. I’m all ears all eyes, cos I don’t know. I do know though that one of my dreams has come true at college this term. For those of you who don’t know, I’m an Architect and I teach at Design School. The bunch of 20-something kids I was mentoring for six whole months have passed their theses with flying colours and done me proud. Shruthi, Supriya, Pallavi and Rasool, it was a wonderful experience working with you guys this term. Shine bright wherever you go!

The kids had kept their noses to the grindstone all through the last 6 months, and I had just one way of showing them how much I appreciated it. I had them over for lunch yesterday, for a home-cooked meal prepared by yours truly. Unfortunately, one of the kids couldn’t make it. Rasool, we sure missed having you around. However, it was a fun afternoon with the girls. There no longer was that teacher-student formality in the air. We talked nineteen to the dozen, laughed a lot, ate good food and languidly settled down to play a few rounds of UNO and beat each other at it while the heavy lunch sank in and we made room for dessert. I know I’d asked you all for menu ideas on the Facebook page. Thanks so much for all those ideas. After much consideration, and depending on the kids’ tastes, I dished up a simple meal of Vegetable pulao, Gobi-matar gravy with oodles of fresh cream, Whole-wheat Bread dahi-vada topped with crunchy sev, and some raita for lunch. Oh and of course, the most humble curd rice was very much there to end the meal with. Ever seen a South-Indian home go without it? Never. Ever. The fun with the food didn’t just end there. What did you think? Of course there’s more to come. Wait a little longer and you’ll hear all about it.
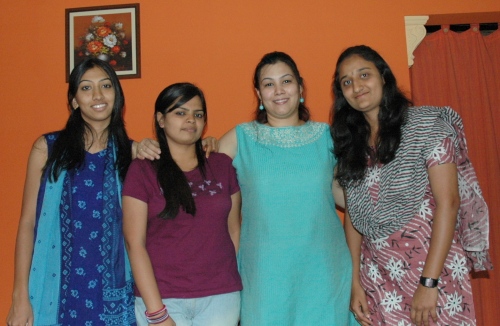
That’s me with my favourite students.
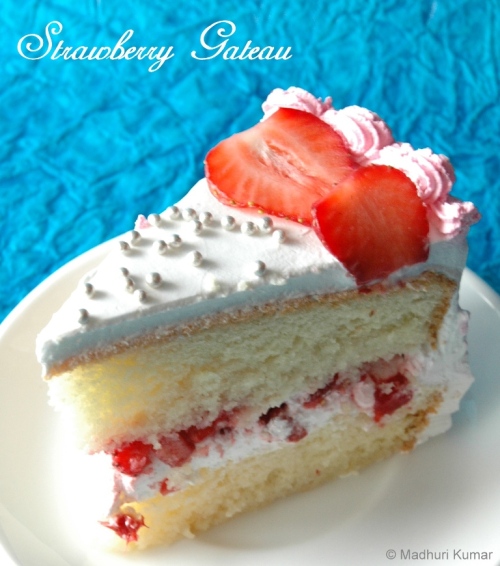
Time seemed to stand still while we played UNO and screamed curses at each other for the occasional ‘Draw 4’, ‘Skip’, or ‘Draw 2’ that we were forced to encounter in the game. Not to forget the glares I got from the kids when I threw a googly at them. This was the one time that they could glare at me without getting a contemptuous glare in return and got a victorious grin instead. Hey, all’s fair in love, war and UNO! And then came the time for the three surprises I had planned for them. One: I’d baked them a BIG, tall Strawberry Gateau to celebrate their fantastic grades. How could I not. Two: I’d gotten mugs with a custom design made just for the four of them…a small memento, hoping that it would serve them as a sweet reminder of me. I was raring to give it to them and see their reaction. Three: I’d baked them some Devil’s food Cupcakes with some equally devil-foodish frosting to take home and share with their family. Again, how could I not. I’m guessing I made their day, cos I’d never seen such wide smiles on their faces before this 🙂 They didn’t want to be left behind either. They got me a lovely black handbag, which is so me in style. How did they know of my handbag fetish I wonder. Thank you sweethearts, that was very touching. You made my day too!

So after UNO, we exchanged gifts and the kids cut the celebration cake. We settled on the couch chatting away as we polished off our dessert plates. Before we knew it, it was time for the girls to leave, for they had a long way to go before they got home. I was sad to say bye. It was a fun last 6 months, and it WAS hard to let them go, although I knew it was time for the little birdies to fly out of the nest. So we said our byes, and they promised not to forget me 🙂
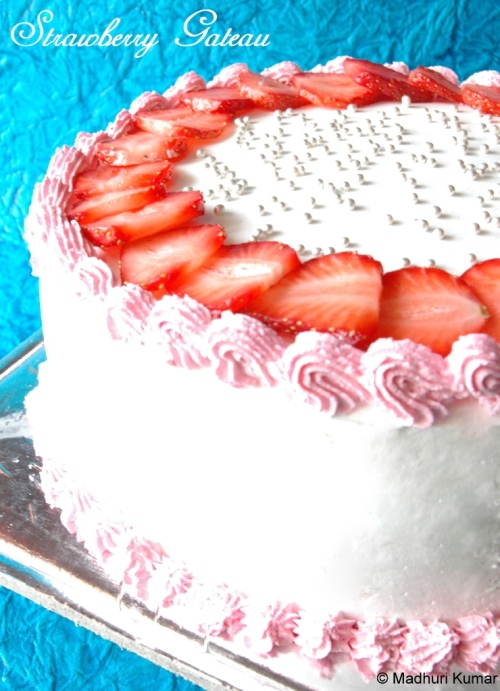
Here they are, gleefully cutting that celebration cake I made them. Would you like some of the gateau too? There are two ways – One, come be my student in college. I’ll treat you to it if you behave yourself. Two, go make yourself one!

Strawberry Gateau
Ingredients:
For the Fat-less Sponge
- All purpose flour/Maida – 1 1/2 cups (150 gms)
- Sugar – 3/4 cup (150 gms)
- Eggs – 5 nos (roughly 250 gms)
- Baking powder – 1/2 tsp (2.5 gms)
- Vanilla extract – 1 tsp (I used 1 tsp of crushed Vanilla bean)
- Strawberries – 15-20 nos, hulled and finely chopped (should make 1 cup of chopped berries)
- Sugar – 1/3 cup (you may want to increase this to 1/2 a cup if the berries are a tad too tart)
For the Filling & Frosting
- Whipping Cream – 2 cups (I used ‘Rich’s’ Non-dairy whipping cream. It made 4 cups whipped cream)
- Powdered Sugar – 4 tbsps
- Cold Water – 1 cup
- Strawberry essence (optional) – 1 tsp
- Strawberries (optional) – as desired

Procedure:
For the Fat-less Sponge:
- Preheat oven to 200C/390F. Line and grease a 9 inch round cake tin.
- Put the eggs, sugar and vanilla essence in a bowl, and beat together till it forms soft peaks and has a mousse-like consistency, about 10 minutes.
- Sieve the flour and baking powder thrice.
- Fold in the flour mixture little by little into the egg mixture with a rubber spatula, taking care not to lose any volume, at the same time ensuring there are no lumps in the batter.
- Add the 1 tbsp of warm water, and mix lightly.
- Gently pour the batter into the readied tin.
- Bake for 30-35 minutes or till a toothpick inserted in the centre comes out clean.
- Remove from oven, and let it cool in the tin for 10 minutes, before you turn onto the wire-rack. Once you remove the cake from the tin, remove the lining as well, and allow to cool completely.
For the Strawberry Jelly:
- Put the chopped strawberries and sugar in a pan on medium flame, and allow to boil till the chopped berries turn slightly mushy.
- They will come together as a nice saucy concoction after a few minutes. Remove from flame and set aside to cool. Once cool, transfer to a bowl and refrigerate.
Note:
- This jelly requires to be made ahead, preferably a day ahead so it can sit in the refrigerator overnight. Plan accordingly.
- If your jelly is still watery even after the berries have turned mushy, take a tbsp of cornflour dissolved in a little water and add it to the sauce when it is still on the fire. Remember to reduce the flame before adding the cornflour-water mixture, and stir continuously after you’ve added it to avoid lumps in your jelly.
- Chill the whipping cream for at least 10-12 hours in the refrigerator. Also chill the beater blades and bowl in which you plan to whip the cream, about 2 hours atleast. Stainless steel bowls work best for this.
- Dissolve the powdered sugar in the cold water. Add the strawberry essence, stir and put it in the fridge.
- Once the whipping cream is good to go, start by whipping the cream on high-speed. Whip until thick and starts holding peaks, about 5-7 minutes. Once done, set half aside in the refrigerator (for the frosting).
- Assemble your sponge, sugar syrup, strawberry jelly while the cream is getting whipped.
- Next, get down to assembling the gateau. Use the bottom of the cake (that was in contact with the lining) for the top. So this means, the actual top of the cake goes to the bottom of the gateau. If the cake has risen too much in the centre, gently level it with a long, serrated knife and then turn upside down.
- Now, this is a very important step to get a flat surface on top of the frosted cake. Using some food colour (even turmeric works), dip a toothpick in the food colour and draw a vertical line anywhere on the side of the cake, from top to bottom. This line will act as a reference when you have to re-assemble the slices while filling the layers. The cake will sit perfectly in place, and give you a wonderful flat surface on top. Miss this step and you may have to be content with a shapeless, wobbly cake once you’re finished.
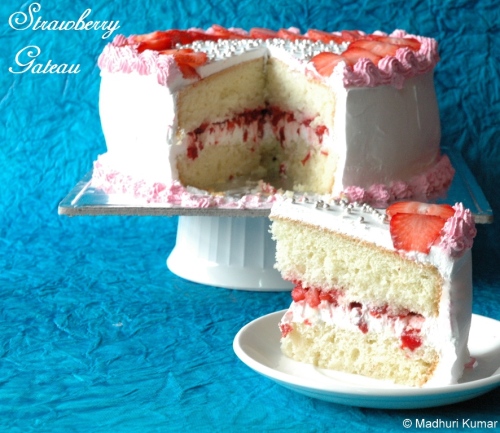
- Gently cut the cake into 2-3 slices horizontally (I cut mine into 2). If you have a tall cake to work with, make 3 slices; your cake will be a lot taller and prettier too.
- Place the bottom-most slice on a turn-table if you have one. I recently gifted myself a heavy-duty cake turn-table. If you don’t have one, set your working base on a high vessel/pan (whose mouth is narrower than the base is wide) that would rotate easily, and that becomes your adaptive turn-table. Vessels with a slightly rounded bottom work best for this.
- Drizzle the sugar syrup over the bottom most layer of the cake using a wide pastry brush. Ensure you cover the entire surface.
- Now, using a palette knife/offset spatula spread some whipped cream generously over the bottom cake layer (don’t spread the cream too much to the edge since the next layer coming over it will push the cream to sides anyway). Cream layers about 3/4th-inch thick should work just fine.
- Next, spread all of your strawberry jelly generously over the cream.
- Now place the second slice of cake over it (remember to match the slices by the line you drew with the food colour), and repeat with syrup and a thin layer of whipped cream on top. Finish the sides with a thin layer as well.
- Now sit the cake in the refrigerator for atleast 2-3 hours, to allow the flavours to marry and get to know each other well. If you’re in a hurry, even 1 hour works. The longer the better though; overnight is best. (And if you’re worried about the other half of your whipped cream going flat by this time, don’t worry, good whipping cream if whipped properly, should stay intact for atleast 3 days. If my word still doesn’t instill the confidence it should in you, then whip 1.5 cups cream for the filling, and whip another 0.5 cup just before you want to complete the frosting).
- Once the cake has sat in the refrigerator for a good amount of time, get it out, finish the top and sides of the cake with more whipped cream. Work with your palette knife/offset spatula and dip the knife/spatula in cold water every 2-3 strokes, to get a smooth finish on top of the cake.
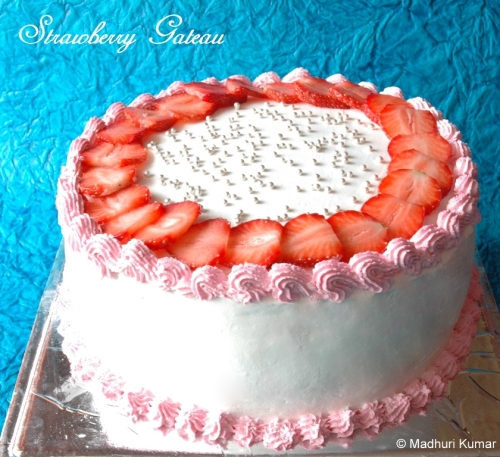
- Finish by decorating the cake the way you fancy. You can see what I did with mine. Do you like it?


Wow I didnt know you teach design.Thats Great.Whats a nice gesture for your students.They must have been so happy.The cake looks awesome too.
That is one good looking cake Mads!! Lucky students 🙂
Hope the gals had gr8 day and you too…cake looks yum…too bad never had a teacher like u 😦
Looks tempting madhuri..with the fresh strawberries 🙂
I am shifting near your house. send me the address 😀
I envy your friends.
Lovely clicks.
Thanks for sharing this recipe.
I have to build lot of patience before I make this one.bookmarked for the future.
Done Nive, I’ll send it across. Come on over 🙂
Thanks. You shouldn’t wait too long to try it.
Thats a lovely gesture from you to your students. I can see that you all had a lovely day. I can’t take my eyes off the gateau. Lucky students…
That’s a lot of hard work…the fruit of labor is definitely sweet!
Glad to come across ur blog. It’s all the more special because you’re also from B’lore & also an Architect! No, no …only my husband is an Architect ! Will keep track of all your escapades in this space.
Nice to know you’re from Blore too Jayashree. We should get together sometime.
Lucky students, wat a gorgeous cake,looks out of the world..
Trust you to have all of us drooling like infants. This looks fabulous, Madhuri. And yes, we certainly can see that you and your students had a great time together. Lucky them, really! No teacher would go out of her way to do so much for their students. They’d better remember you all their lives!
lovely ! am bookmarking this- i know it will be quite some time before i think of attempting this; but the pic is gonna motivate me !
Wowo that is a beautiful cake.
I want to be your student! Will that do?
I never knew u are an Architect… I really wish i was ur student 😀
Thats brilliant …. i must say.. amazing… and ur explanation of each and every step is so helpful.. Thanks for that 🙂
I know I do not need to be your student,or bake it myself–coz you’ll bake it for me..say yes please!!!!Love it absolutely!!I am waiting for the Devil,but the wholewheat Bread Dahi vada sounds too good to be true,share that soon too!!
Done! Let me know when you’re coming. I’ll have one ready and waiting for you 🙂
Will share the Whole-Wheat Bread dahi vada recipe soon.
wow..your students are so lucky 🙂 it’s a gorgeous gateau !
And I’m liking the new Avtar of CCN 😉
I came by to see your blog’s new avatar. Ich liebe!! Very sunny and bright indeed!
Your students are really lucky. They get food and gifts and cake. Where were you years ago when I went to college?
I love how perfectly shaped the cake is and how evenly done the icing is. I miss those little gol gol silver thingys. Eat a few for me please!
btw – I love the new look and the 3 column page! And thank you for keeping me in your blog list!
Nice cake here Madhuri and a sweet gesture for your students! Wail!!! We did not have teachers who would feed us like this when we were students…sigh!!
Luv ur cake Madhuri ..its lovely!
I want one more piece…I can never get enough of that cake Ma’m 😀 Thanks so much Ma’m…I can never forget that day 🙂
Wish I was one of your students Mads. Lucky them. I love UNO too. have played so many times and screamed, yelled & lost my voice couple of times. The cake looks gorgeous. 🙂
Siri
Made this for a party , Madhuri and needless to say it was the centre of attraction..:) My first attempt at layered cake and a fancy one at that came out great…Couldn’t have made it without your constant assurances which made me confident to venture this cake…:)
I am going to try the Fatless Sponge from this recipe today to bake a Pineapple Pastry for my cousin sisters who’re coming over for lunch over the weekend. Wish me luck!!
Just done baking the Fatless Sponge. Guess What? IT WORKED!! But, I think I could reduce the baking time by about 4 minutes the next time to avoid extra brown edges. Danke Schone!!