
 Feels SO good to be back! Everyone must be busy prepping for Ganesh Chaturthi tomorrow.
Ganesh Chaturthi has always held a special place in my heart. At Amma’s, this is the most grand festival after Diwali. Amma makes all of Lord Ganesha’s favourite foods for the neivedhyam (food offering) – an exhaustive menu of Kadabu, Modak, Uzhundu Kozhkattai (a family heirloom recipe), Amminni Kozhkattai, Idli, Coconut Chutney, Kosambari/Kosumalli (a salad made with soaked channa dal/urad dal and a melange of veggies), Aama-vadai (lentil fritters), and the regular fare of sambhar, rasam, pudithuvval (poriyal/palya), rice, and poppadoms as well.
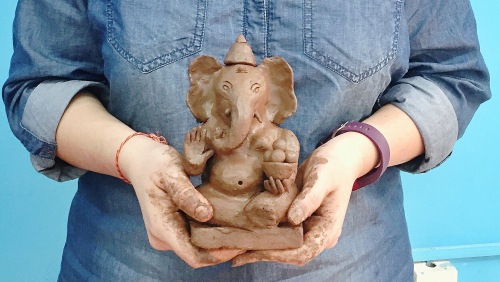
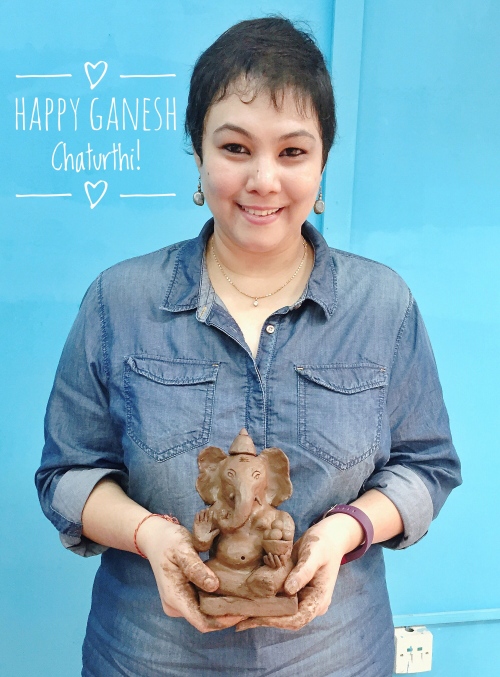
I made my first hand-sculpted eco-friendly Ganapathi idol yesterday. What fun it was! I don’t think I’ll ever go back to buying the idol every year. This feels so rewarding, and the whole experience was therapeutic to boot. Nothing like the joy of creating something with your hands 🙂
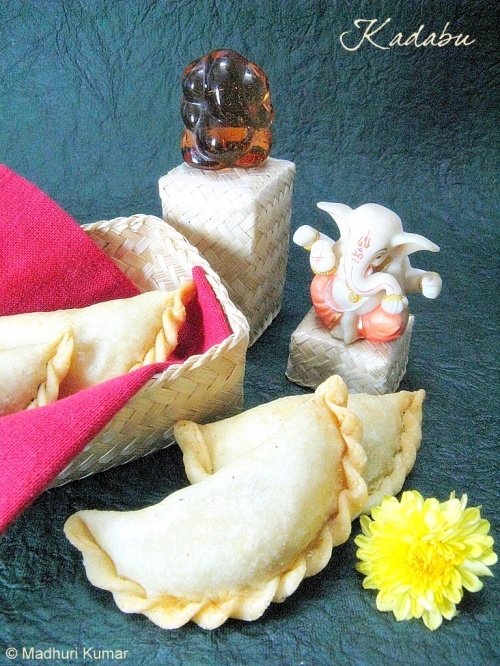
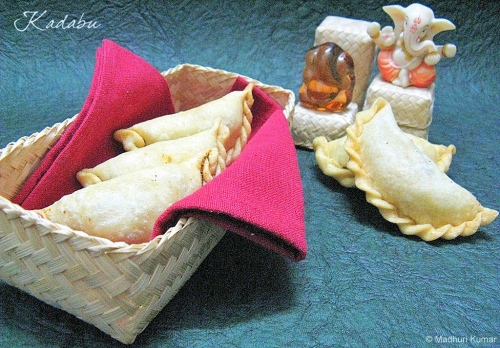
KADABU | SWEET SOMAS (SOMASI)
Recipe Source: Amma
Preparation Time: 30 minutes
Comes together in: 1 hour
Makes: About 20 kadabus
Ingredients:
For the Dough:
- Chiroti Rava (the finer, small variety of semolina) – 2 cups
- Ghee – 4 to 5 tbsps
- Salt – a pinch
- Water – as required (to make dough of chappathi dough consistency)
For Filling:
- Grated Coconut – 1 cup
- Jaggery – 1/2 cup
- Cardamom powder – 1/2 tsp
- Ghee – 2 tbsps
(Jaggery and grated coconut are always in a 1:2 proportion just in case you want to scale the recipe up/down)
For Frying:
- Cooking oil of choice – as required (you could even fry it in a ghee + oil mix to make the kadabus that much richer)
Procedure:
- Take all the ingredients for the dough in a bowl. Mix to form a smooth dough of chappathi consistency, and knead well. Cover and let it rest for 2 hours.
- Prepare the filling. In a flat bottomed pan, add all the ingredients for the filling, and allow the jaggery to melt on medium heat. If you make small, fine pieces of the jaggery, it will melt sooner. Keep stirring to ensure the bottom doesn’t burn. Once ready, set aside, and allow to cool. This usually takes just 5-10 minutes to get done.
- Once the dough has rested, and you’re ready to make the kadabus, make lime-sized balls of the dough.
- Take one lime-sized portion of the dough, and roll out to roughly a 4-inch circle. Since the dough has ghee, there is no need to dust it with any flour while rolling out. Also, this prevents the oil from turning black and giving your kadabus ugly specks of black flour once fried.
- Add a spoon of the filling on top of the rolled out circle. Ensure not to be over-enthusiastic and not add too much filling during this step. One tbsp is just fine. Else, you won’t be able to seal the kadabu. Or even if you manage to, it will open up in the hot oil while getting fried.
- Flip the side away from you, and bring it over the side closer to you. Press all around the open circumference, to seal the two edges together, and prevent any of the filling from coming out.
- Now, start from the left side, and make the fluted pattern. The picture below should help you figure out how. Continue all around the circumference till you reach the right side. The perfect fluted edge will take a lot of practice, but it’s definitely not hard to achieve. If you find this hard to do, take a fork, and press down on the edge. Continue till you have sealed the entire half circle. I like to make the fluted edge, it’s rustic and beautiful.
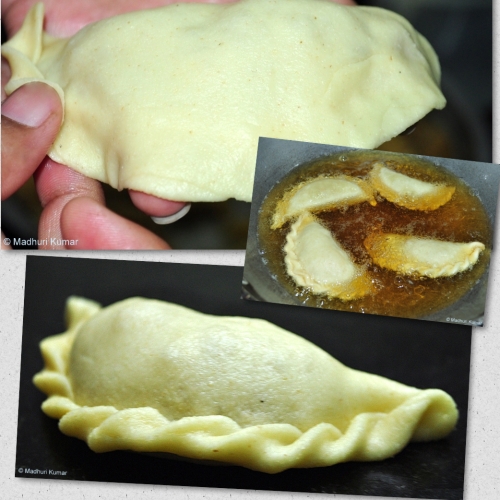
- Repeat this with all the dough you have. I usually assemble 6-8 kadabus and then put the oil on to heat. It gives me a head start, and I continue frying and assembling the kadabus side-by-side. This way, the covering doesn’t dry up on the assembled kadabus.
- Heat some oil (or a mixture of ghee and oil if you wish) in a pan. Test if the oil is hot enough by dropping in a small pinch of dough. If it immediately rises up while the oil gently bubbles, the oil has reached the perfect temperature to start frying.
- On moderate heat, fry the kadabus in batches of 4-5, depending on the size of your pan. Don’t overcrowd the pan, else they all won’t get fried uniformly.
- After a minute or so, gently turn the kadabus over to the side, so both sides are fried evenly to a shade of golden brown.
- Drain on tissue paper, and allow to cool completely before you store them in a box.
After neivedhyam, I like to ever so slightly warm up the kadabu in the microwave before I have it, letting the juices from the warm filling ooze out and explode in the mouth!

May the Lord shower you with blessings as generously as his enormous appetite! Eat well, be merry, and have many a bout of food coma, as is befitting.
Until the next one, which won’t be very long this time, I promise 🙂
Much love x
Ganapathi Bappa Moreya! Mangal Murti Morya!


Yay! Welcome back da.. It feels so good to see you and your beautiful ganesha. 🙂 This year we made a turmeric version (just a small mound) but next year, I want to make a clay one like you did. :-). I made a simple lemon rice and undrallu for naivedyam. We call these kadabu as kajjikayalu (in telugu) and so wish I could taste one now. Sigh!
Hugs,
Siri